Honestly? I do NOT care about site speed optimization.
You know what I DO care about?
- SEO traffic gains
- Happy readers
- Not having users close my site because a blog post is taking forrreeeevvvverrrr to load
In this guide, we WON’T be diving into every nitty-gritty optimization detail–but rather the three BIG (and quick) things you can implement to get your site 90% of the way there.
I honestly believe that you could implement every tool I cover in this article in less than 45 minutes.
#actionable
Why does website speed optimization matter?
There are two huge reasons why this is important:
- Google (SEO)
- Website visitors
Google has said repeatedly (here’s proof) that page speed is an important ranking factor in the mobile-first world!
If you want to drive SEO traffic, it’s vital you optimize your site for fast-loading pages.

Then there are the actual human beings that land on your website.
They’re impatient ????
Did you know that the BBC once did a study–and found that for every ONE second it takes your page to load, you lose 10% of visitors?
Think about that…
If you took a page’s load speed from five seconds to two seconds, you could be getting 30% more visitors to actually SEE your content.
Mind = blown.
Fast load times matter, therefore site speed optimization matters.
Our 3-Step Process for Improving Page Load Times
- Make sure images are compressed
- Implemented page caching
- Use a CDN service
Let’s breeze through these.
But first–let’s quickly check how fast our site is now…
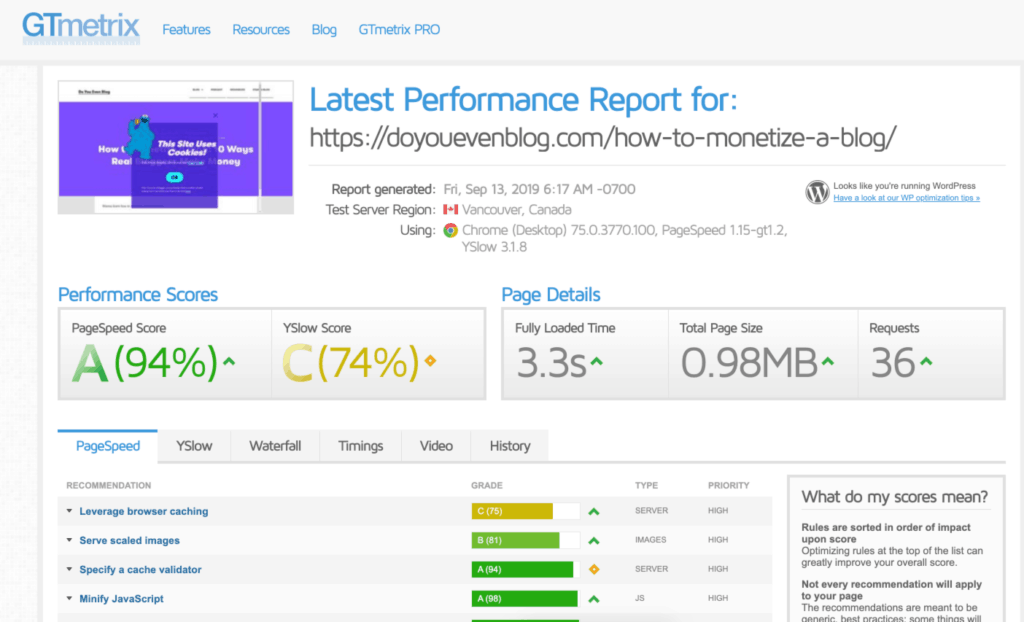
How to test your site’s speed:
You can use any of those to not only see how fast your site loads, but also diagnose specific issues that are slowing your load times.
Best practices for using these tools…
1 – Don’t just test a URL once.
Run some tests over a few minutes, or even over a few days. Take an average (though the issues will likely stay the same)
2 – Don’t just test your homepage URL.
Test blog posts you want to rank for as well!
3 – Don’t stress over the “grades.”
Remember, you’re a lazy blogger!
The grades are somewhat arbitrary–you really just need an overall diagnosis and a picture of what issues to fix.
Don’t nitpick.
Now let’s move on to the three big steps that should take care of most of any issues you’d see from these speed test tools 🙂
Image Compression: An overview
Though there are several things that contribute to slowing down your website, nothing will destroy load times more than big files.
And images are often big files! (I’m talking bytes, kilobytes, and megabytes)
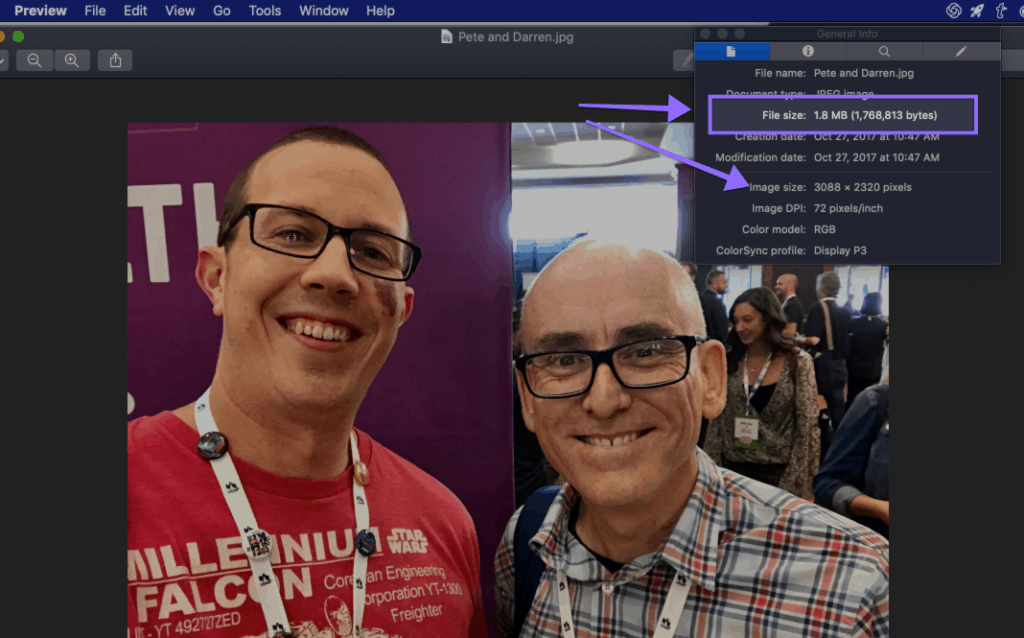
An image compressor will take an image, do some background magic (I don’t know how it works), and spit out an image that looks almost EXACTLY the same, but with a smaller file type!
ShortPixel is my favorite image compression tool, and I’ve tried them all.
Imagify, Smush, Compressor.io, TinyPNG–I’ve tried em all.
ShortPixel is the way to go.
Note: You get 100 free image credits a month on their free plan, which is likely enough for most bloggers! However, I HIGHLY recommend splurging $9.99 to buy 10,000 image credits that never expire.
Note 2: OR you could join us in the Online Impact community, where you have unlimited ShortPixel credits included in your membership 🙂
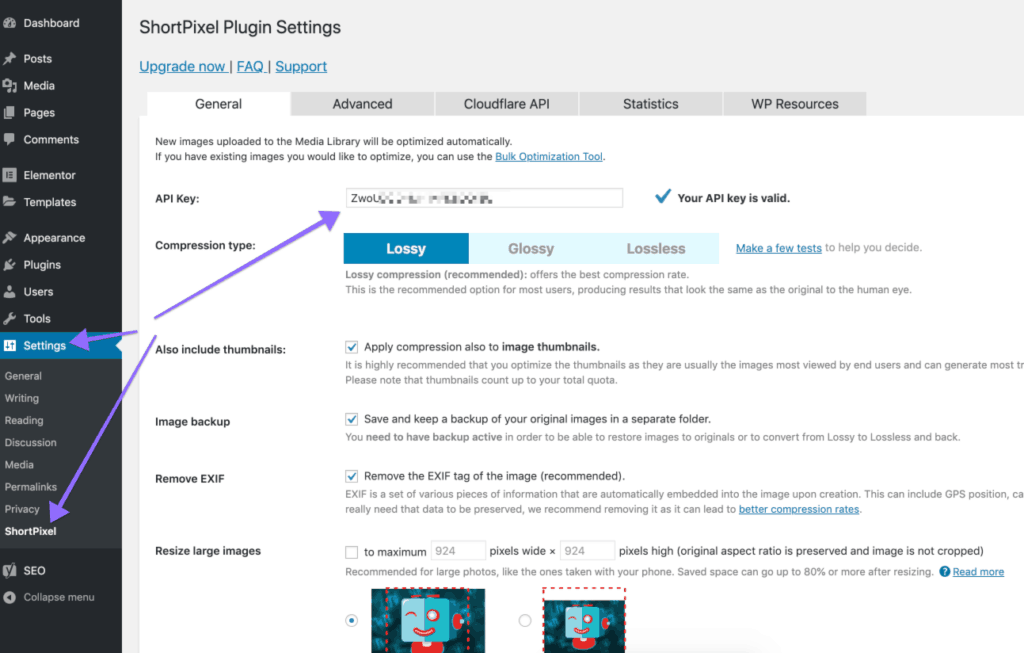
How to Set-Up ShortPixel
- Head to your plugins dashboard in WordPress
- Search for “ShortPixel”
- Install & Activate
- Request an API Key (it’s free)
- Enter API key
You can also sign up via the website (needed if you’ll need some bulk image credits) and grab an API Key from your dashboard)
Congrats! You now have ShortPixel installed, and it will automatically compress images when you upload them WordPress!
You can continue adding images to your posts, etc, and ShortPixel will compress them in the background on autopilot.
Three quick notes on ShortPixel settings
The REALLY lazy blogger could probably stop now–but there are few things to note:
For every image you upload, you will be using MULTIPLE CREDITS!
This is because your theme automatically creates a few “thumbnails” for each image–but if you don’t use thumbnail sizes, you can exclude these!
That’ll save you some credits.

Next, it’s important to note where you can access individual image settings–it’s in your media library, but in “list view.”
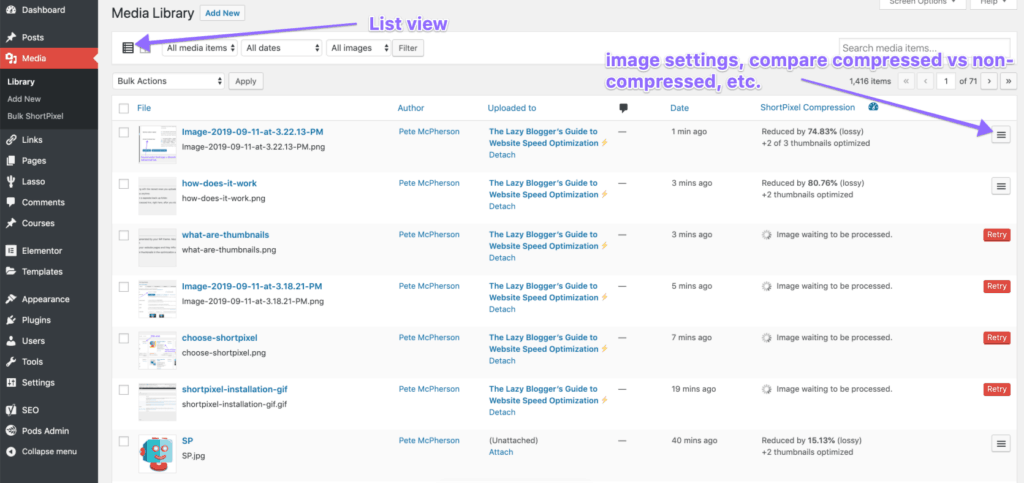
You can also revert a compressed image back to its original, uncompressed version here.
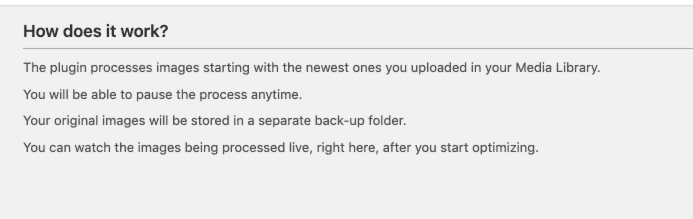
Last, you can bulk compress all of your existing images in one click!
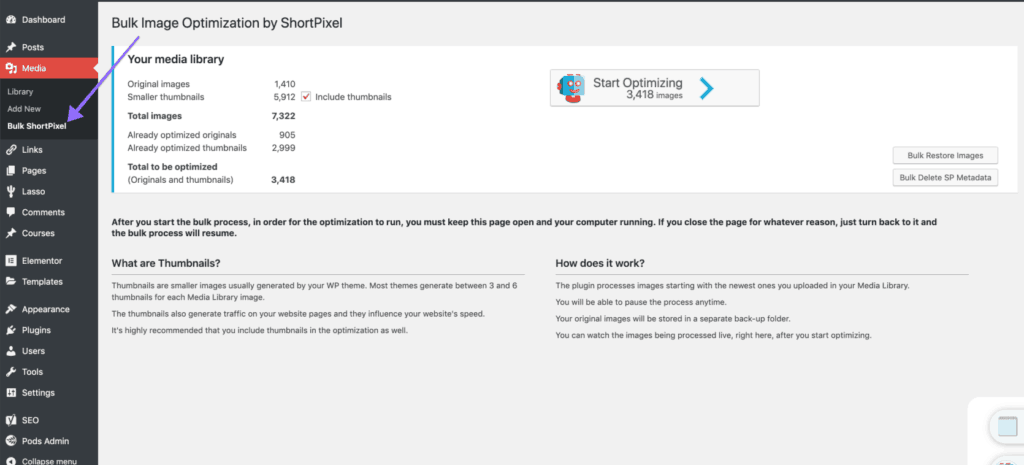
Again, while the 100 free credits a month is probably fine for ongoing use–you’ll probably need to buy additional credits if you’re doing bulk work.
Caching: An overview
Kinsta did an awesome job of explaining this (super boring) subject:
We can break down the idea of caching by comparing it to a simple math problem. What’s 10 times 2? Most people can immediately tell you the answer is 20. Why is that? They’ve memorized the answer. In fact, there’s probably a minimal amount of calculation going on their head.
Gross oversimplification warning…
A “cache” is pretty much like a little memory bank–it “memorizes” a bunch of website files, server requests, etc.
When a browser loads your site, it just spits back what it’s memorized, rather than calculating a bunch of stuff from the server.
You’re welcome >_<
Different cache plugins:
- WP Rocket (the best and my favorite, but paid)
- W3 Total Cache
- Autoptimize
There are others, but these are the only ones I recommend.
Let’s get it up and running.
Oh, and Online Impact membership also includes unlimited access to WP Rocket for free!
How to set up WP Rocket
- Purchase the plugin and download the zip file!
- Upload the plugin in your WordPress dashboard as usual, then activate.
- Congrats, your site is faster!
Seriously, it actually does wonders right out of the gate.
However, there are some additional settings that I’d recommend checking.
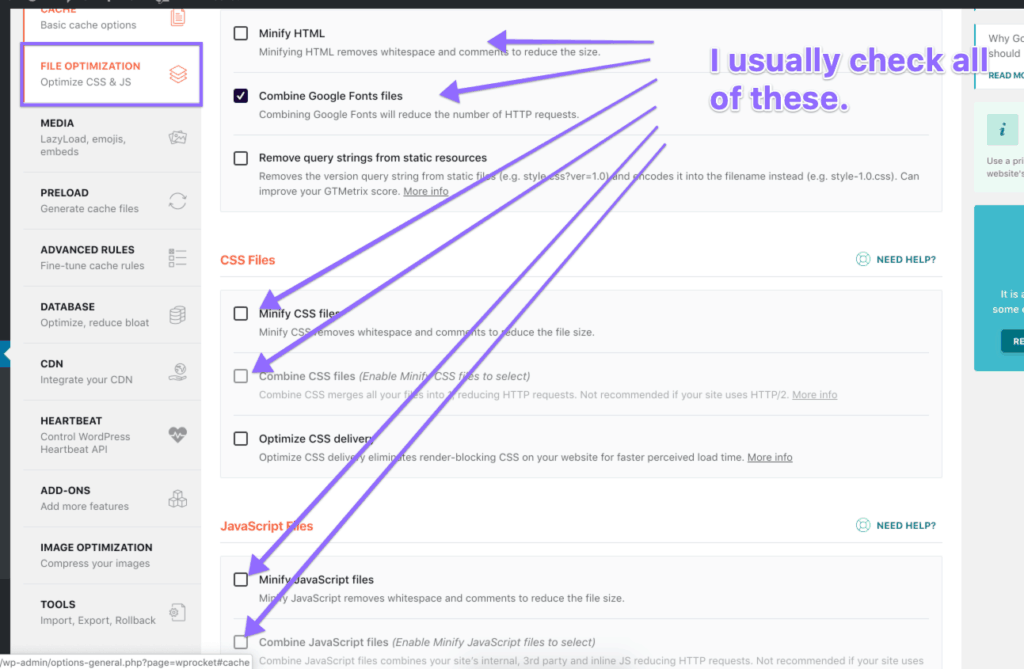
Under file optimization, I’d suggest checking the first two boxes under each category:
- HTML
- CSS
- Javascript
Checking some of those will bring up a little “confirmation” warning you’ll have to check, but I’ve personally never had any issues.
Note: If checking one of these boxes breaks something, uncheck it and then read more documentation here!
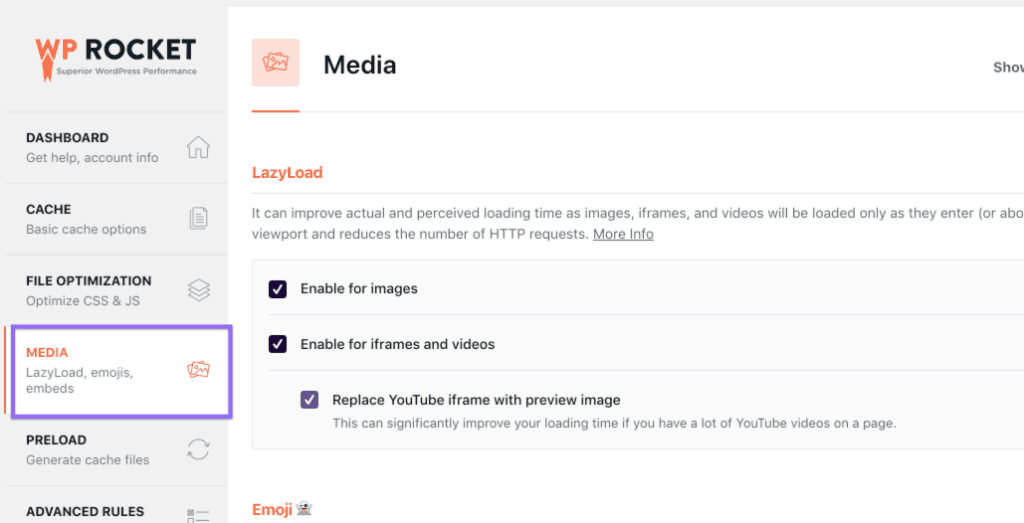
I personally check all three boxes for lazy loading images & replacing iframes and YouTube videos.
Should you lazy load images? I’d argue yes, but here’s what Google has to say on the matter.
Don’t forget to “clear” your cache!
Remember the math metaphor?
Your cache is memorizing “20” for the calculations 10 times 2.
What if you changed it to 10 times 3? (I.e. made CSS or Javascript changes or installed a new plugin or deleted an old one?)
You’ll need to “clear” your cache so it’ll run the new calculations!
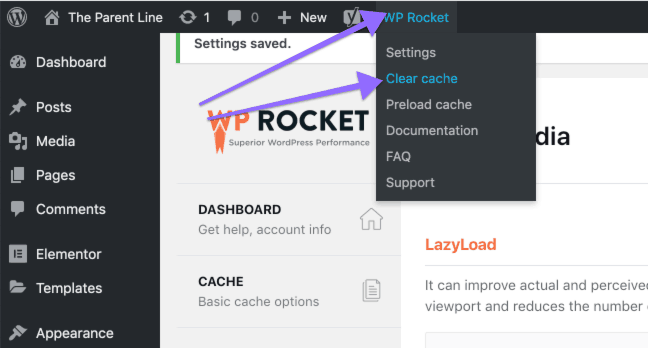
Luckily, we can clear our cache with one button, found on the WordPress top bar (or in WP Rocket settings).
You shouldn’t have to do this often, and luckily WP Rocket is smart enough to prompt us to clear the cache whenever we add/delete a plugin!
Wooooooo site optimization on easy mode.
What’s a CDN?
CDN stands for Content Delivery Network.
Using a CDN basically takes your content and distributes it to different servers all over the world!
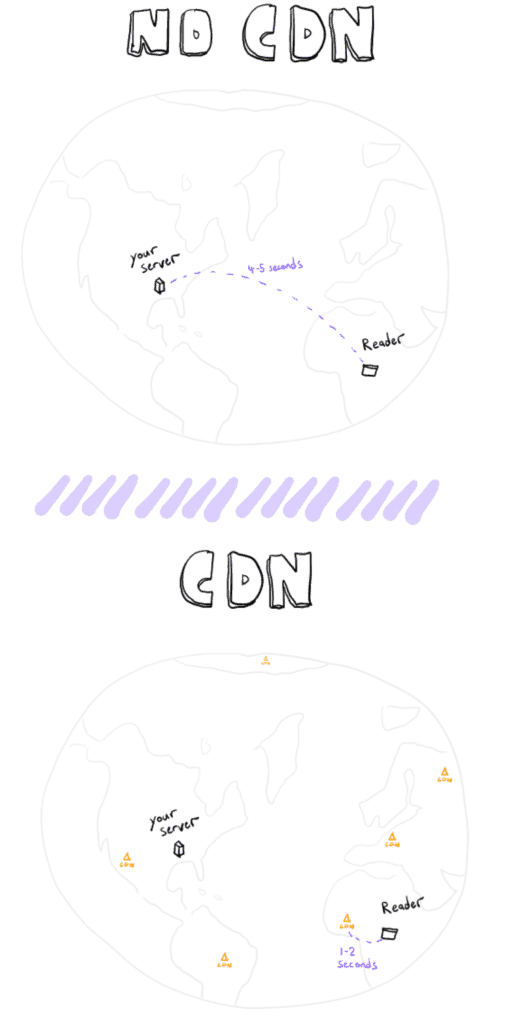
That way, if somebody in Turkmenistan visits your blog post, their browser will pull your content from a nearby server, rather than YOUR server (which could be in San Francisco or something).
Having your content on a server close to your reader = a faster-loading website.
How to set up Cloudflare CDN
Cloudflare is 100% free for one site!
Important Note: You WILL be changing your nameservers in this step!
This requires access to the backend of your website, etc.
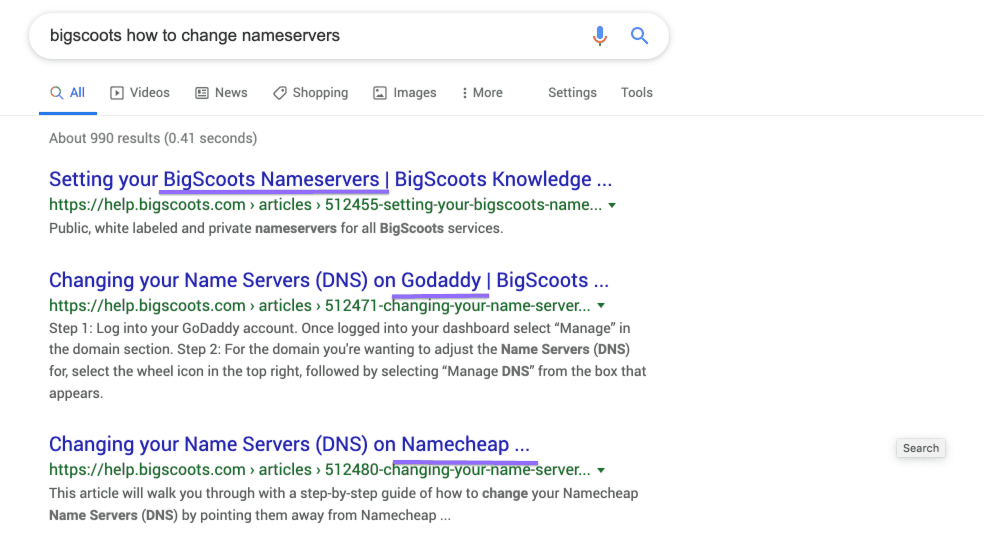
I HIGHLY recommend Googling instructions based on your domain registrar (not necessarily your host). I.e. “how to change nameservers Siteground,” etc.
First, you’ll sign up for an account.
Second, you’ll add a site.
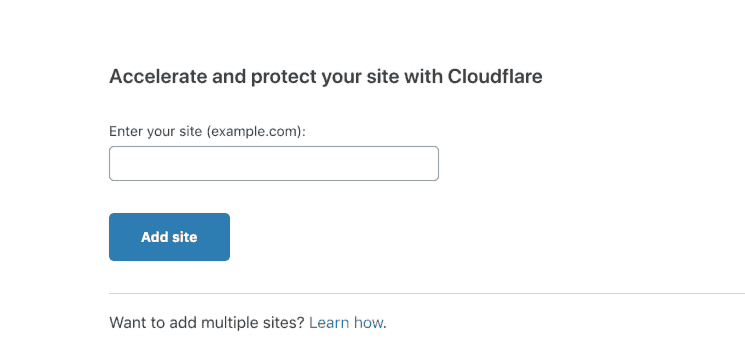
Honestly, Cloudflare does an incredible job walking you through this process step-by-step.
Third, choose the free plan.
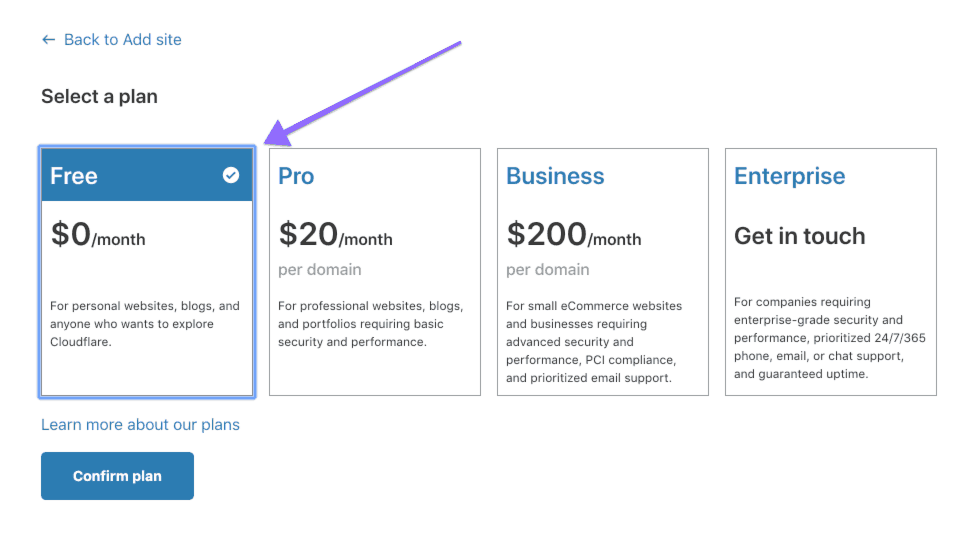
The next screen will be a bit funky.
The official “to-do” item for this screen is usually just to double-check the records Cloudflare found.
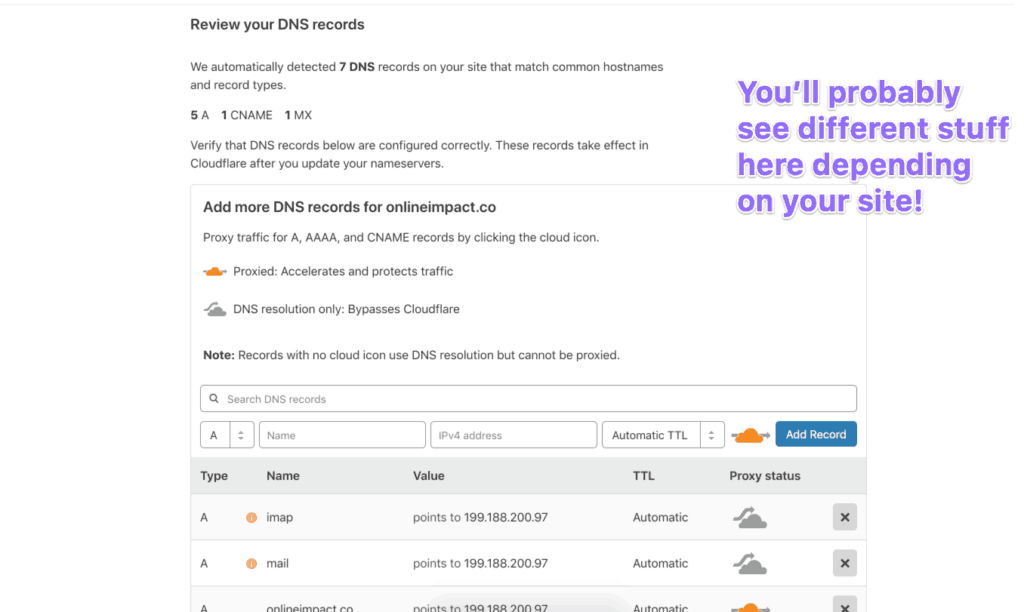
Cloudflare also says to “manually add missing DNS records.” (See their documentation here).
As a lazy blogger–I ALWAYS just hit continue–and troubleshoot later if things don’t work out!
My official recommendation is to know what you’re doing–my unofficial recommendation is just to blaze forward and reach out to their support if something doesn’t work.
????
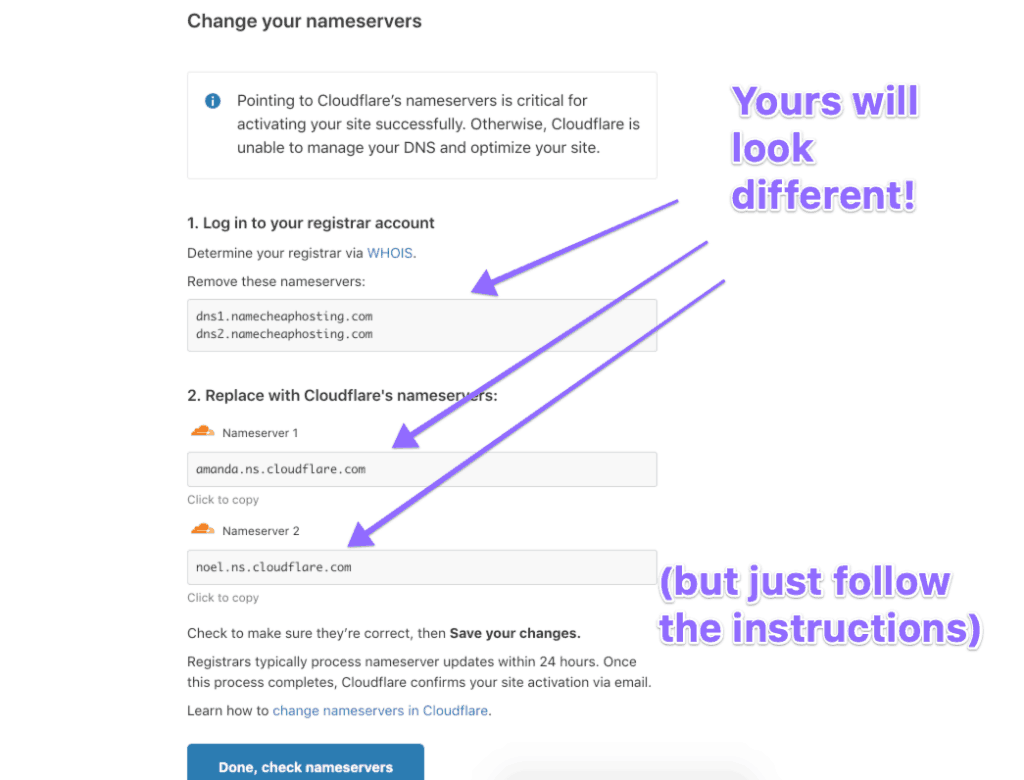
The next (and really the last) step is to change your nameservers!
As mentioned above–I recommend Googling “how to change nameservers” + “your-domain-registrar” and following instructions.
Note: You change nameservers where your DOMAIN settings are–which could be a different spot than your hosting settings. For example, Godaddy is still my domain registrar, and where I update nameservers, even though my site is hosted on BigScoots.
Change your nameservers like Cloudflare tells you to, then wait a few hours!
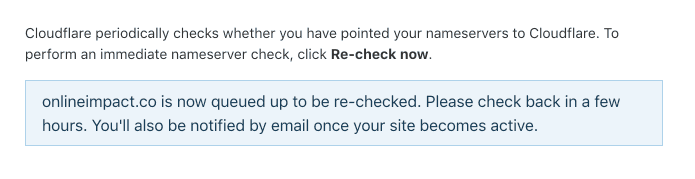
You should receive an email once your site is “active,” then you’re good to go!
You’ll also see this in your dashboard:
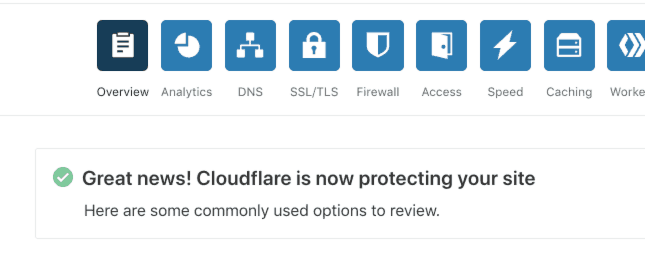
wooo fast loading websites!
Bonus Step: Connect WP Rocket and Cloudflare
Did you know WP Rocket can actually control some settings in Cloudflare–right from your WordPress dashboard?
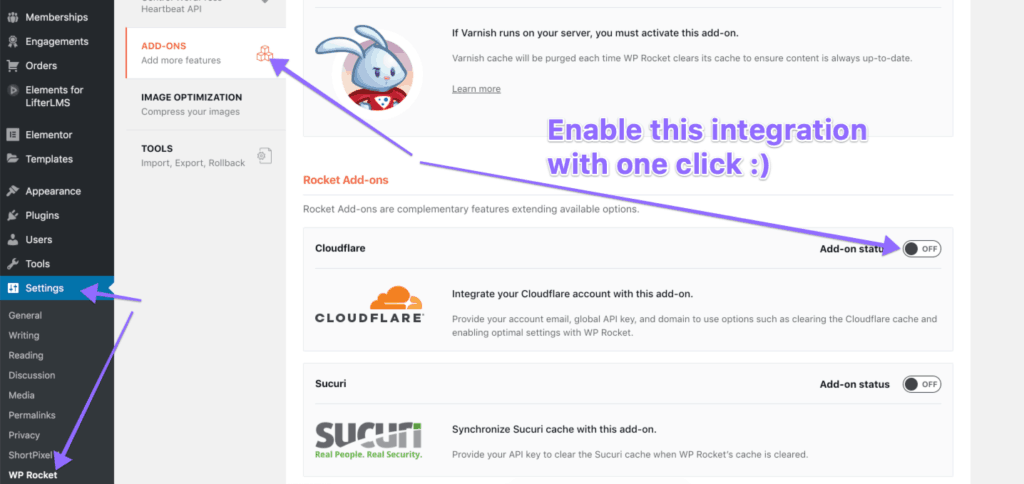
Once you enable the addon, you’ll immediately have the option to enter some API credentials from Cloudflare.
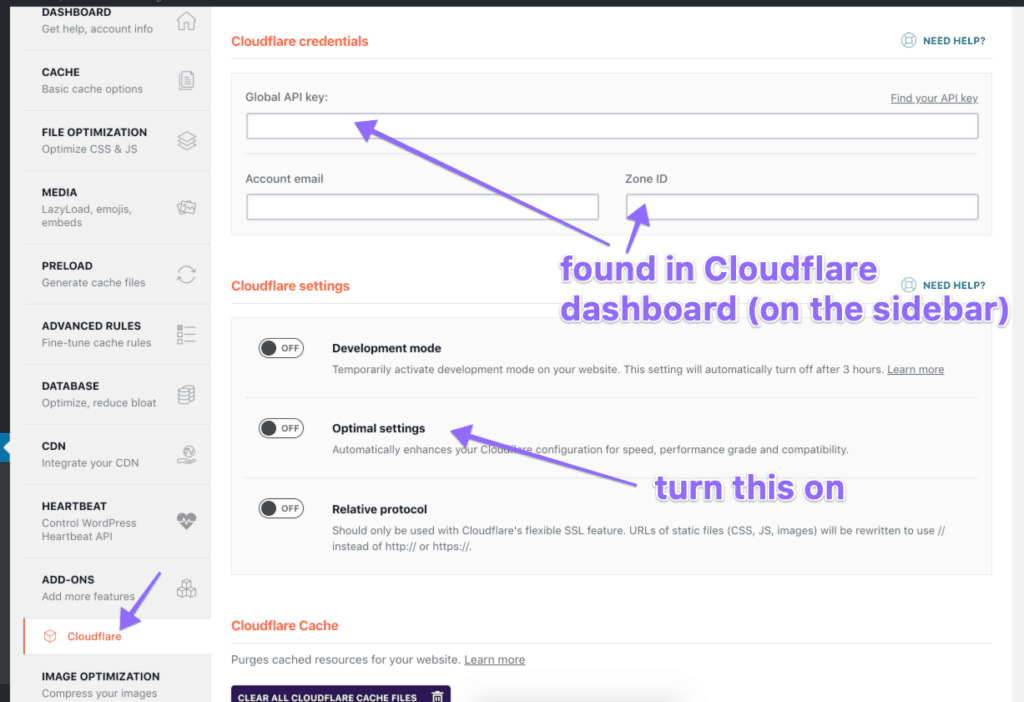
These are found in your Cloudflare dashboard, in the sidebar.
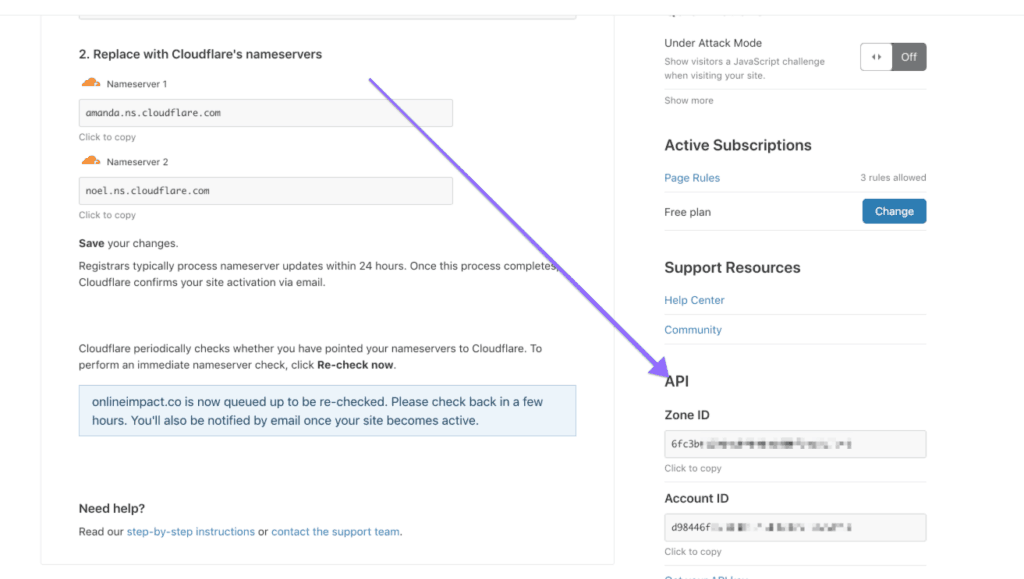
Copy and paste that stuff in, and don’t forget to hit “save changes” in your WP Rocket settings.
Congrats!
Your site speed should be way more optimized.
*
Want WP Rocket and ShortPixel for free? (and a full site optimization course?)
Join us in Online Impact 🙂
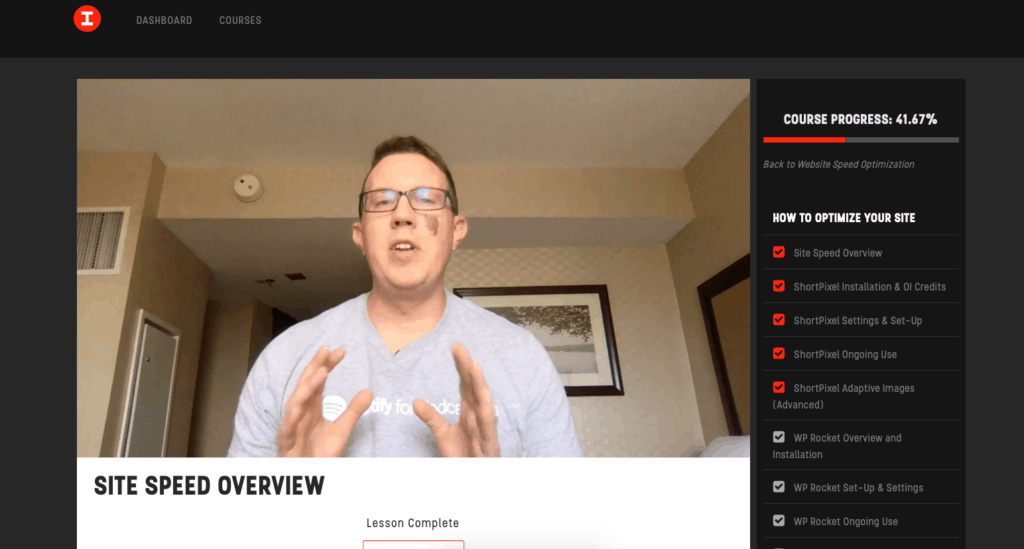
I just published a super short & actionable site optimization course–which walks through everything we’ve done here, as well as a few more advanced things.
SEO Gains woot woot.
Did I mention you’ll also get access to premium tools, included with your membership?
- WP Rocket
- Unlimited ShortPixel credits (handy for bulk-optimization)
- Elementor Pro
- StudioPress themes
Now go get your site nice and speedy!